Kodi is a free and open-source media player launched in 2002 and initially known as “Xbox Media Player.” Then, in 2014, The XBMC Foundation — which is responsible for delivering the service — renamed the app. Whether you’re thinking about using it or already do, one of the things you need to know is how to update Kodi.
We live in an on-demand culture that has drastically affected how we buy things. However, it also impacts the way we enjoy media. This service facilitates that need by organizing the media you legally own. But if you don’t know how to update Kodi, older versions might not work as expected and could leave you vulnerable to security risks.
Ready to learn how to update Kodi? Keep reading to learn several options for getting the latest version depending on your platform.
1. Learn Whether Your App Needs Updating
Whether you just splurged on a fantastic Prime Day gadget deal or are exclusively working with this media app, the first step of device management is to find out whether updating is a warranted action.
When you first launch this platform, you’ll see a short message displayed on the screen that says which version you have. However, it may appear and go away too quickly for you to read it.
If it does, go to the Settings screen. When you see the Device Summary information, look in the bottom right corner.

Image: Kodi.tv
The Version Info section shows the Build, and it’s the version currently installed. Next, go to the service’s website and look for notifications that show up when new options are available. If the one you have is older, it’s time to download the latest update.
Even if you don’t take the step of finding out what version you have, the interface itself should show a pop-up box, like the one below, when necessary:
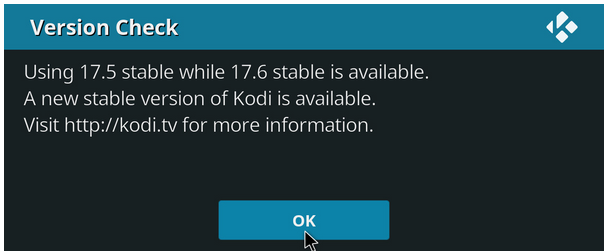
Image: Kodi.tv
It shows which version is running as well as whether there’s another stable update to use instead.
2. Download the Latest Version From the Windows Store or Update Your Mac
When using this service on the Xbox One system or your Windows PC, go to the Windows Store to get the newest edition. It’s free. The core functionality of the program works on a Windows 10 S phone too, but the app description in the Windows Store reveals that some add-ons might not function on that kind of smartphone.
If you’re on a Mac, go to the service’s download page and scroll down to the Apple icon. When you click on it, notice the tabs across the top of the download window:
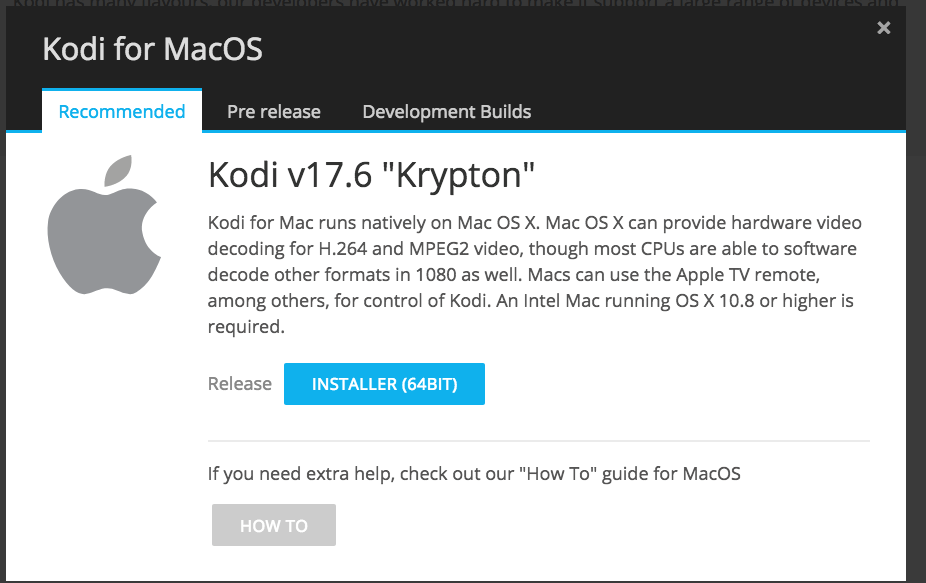
Image: Kodi.tv
Some of the downloads for other platforms also have them. As you might expect, the Recommended option is the one considered most stable and reliable, while the Pre-Release and Development Builds are in the works and might be prone to crashes or bugs.
Choose the one you want, then click the blue button associated with it. During the download process, you’ll see a dialog box that warns you are replacing an older version of the app. That’s the intention here, after all, so go ahead and consent to that.
3. Updating the App on Your Phone
This media service is intended for use on a TV, but mobile apps still exist. If you’re using Android, you can go to the Google Play Store and check for updates for the individual app.
Launch the Google Play Store, then select My Apps & Games after tapping the menu icon at the top of the screen. It looks like three horizontal lines. Scroll down until you find the app to update. If you need a new version, you’ll see an Update button to tap to start downloading the latest content.
Alternatively, turn on auto-update for the app. Select the More button associated with it. The icon looks like three horizontally oriented dots. Then, check the box for Enable Auto-Update.
Don’t use the Google Play Store? No worries. You can also update your Android through a service provider link that contains a standalone installer.
Getting the latest version for an iPhone is trickier unless you’re working with a jailbroken device. Assuming you aren’t, it’s necessary to use a piece of third-party software called TweakBox or Cydia Impactor.
Alternatively, check out these installation instructions from the service provider. They also cover how to perform updates.
4. Updating on Your Fire Stick
To manufacture devices that promote productivity, many device makers aim to create gadgets that are increasingly smaller and suitable for our daily activities. One example is the Amazon Fire Stick. It looks like a TV remote and performs some of the same functions, but responds to vocal cues courtesy of Alexa compatibility.
When you’re using an Amazon Fire Stick, first uninstall the current version. Go to Settings, then choose Applications. From there, choose Manage Installed Applications.
Navigate to the desired app icon and select it. Choose Force Stop first, then Uninstall.
Now for the updating process. From the Fire Stick’s Settings menu, choose Device, then Developer Options.
When you see the Apps From Unknown Sources option, enable it.
Next, if you don’t already have it, download the Downloader app for the Amazon Fire Stick. It’s in Amazon’s App Store.
After that, go to http://www.kodi.tv/download and choose the 32-bit option for Android. The Fire Stick’s operating system is a branch of Android, so that’s the appropriate choice. The download starts after you confirm your selection. You’ll also see a progress bar on the screen.
Why Is Updating Recommended?
Potential risks accompany your desire to use any software, including this one. However, the developers aim to make each release more secure than the last. That means, by updating regularly, you’re keeping yourself and your system as safe as possible.
Thanks to the steps listed above, you can get updates without hassles.
Recent Stories
Follow Us On
Get the latest tech stories and news in seconds!
Sign up for our newsletter below to receive updates about technology trends


")
 (2)")